Front Brake Calipers
SAFETY FIRST: Protective gloves and eyewear are recommended at this point.
Warning: Brake fluid is very caustic and can damage paint, chrome and plastic. Wipe up any spills immediately.
Front Brake Pad Replacement
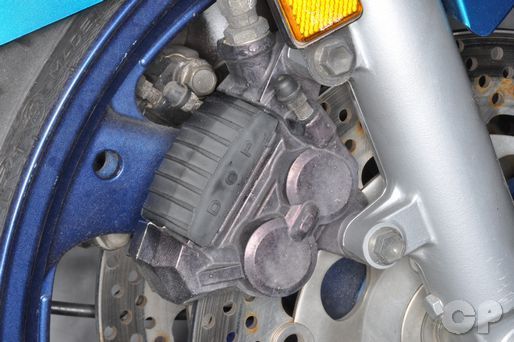


Remove the pad cover.
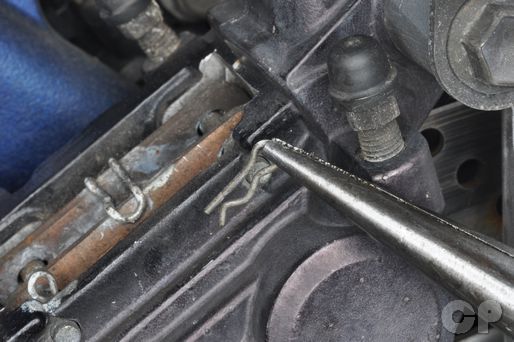
Remove the pin clips with needle nose pliers.


Pill out the brake pad pins with needle nose pliers.


Remove the brake pad springs with needle nose pliers and remove the pads.
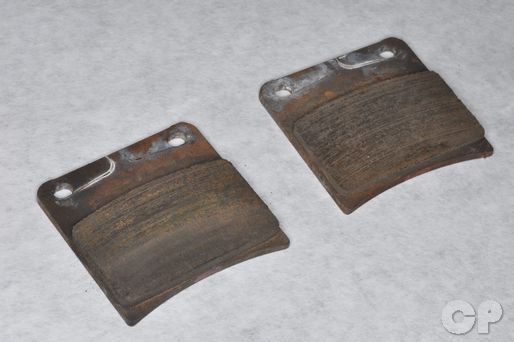
Inspect the wear of the brake pads. If a pad is worn past its wear indicator or has uneven wear replace both pads for that caliper.
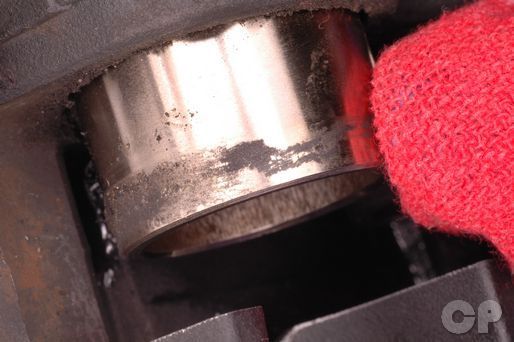
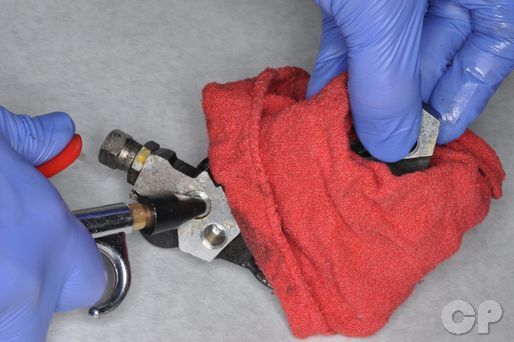
Clean the pistons with a rag.
Install the pads and springs into the caliper.
Insert the pad pins through the caliper and brake pads.
Insert the clips through the pad pins.

Install the brake pad cover.
Caliper Removal
Drain the brake fluid. See the Brake Fluid topic for more information.
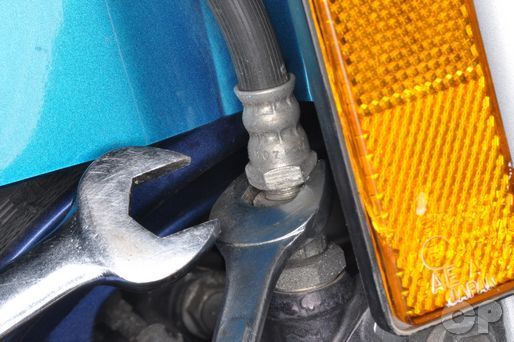
If you plan to disassemble the caliper hold the brake hose attachment with a 14 mm wrench and loosen the line with a 14 mm wrench.
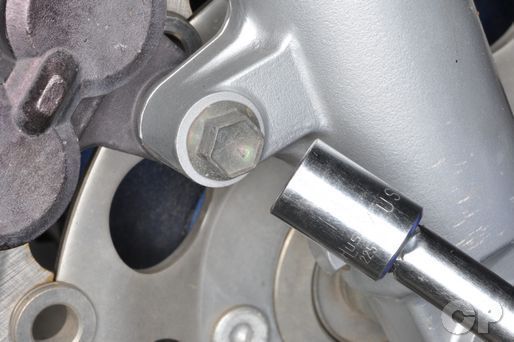


Remove the two caliper mounting bolts with a 12 mm socket.


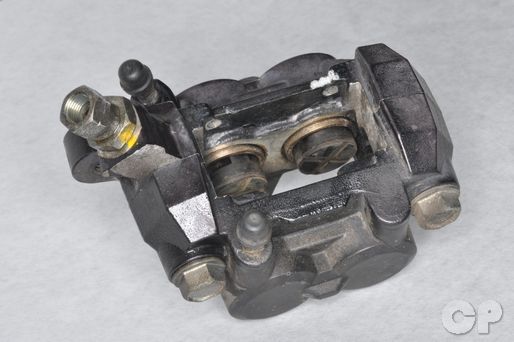
Remove the caliper from the fork leg and remove the brake hose if necessary.
Disassembly


Remove the two caliper bolts with a 14 mm socket.
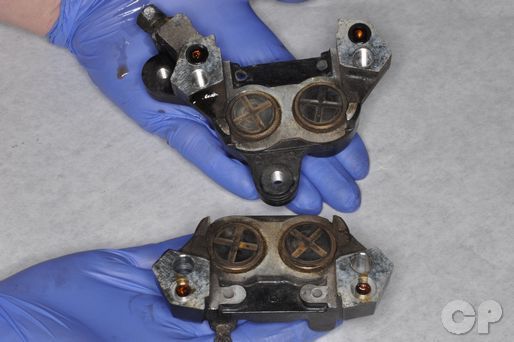
Separate the caliper halves.


Remove the two O-ring seals.
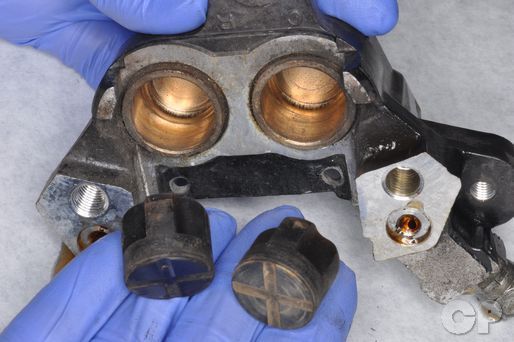
Remove the piston cushions.
Place a thick rag over caliper piston and use compressed air to move the pistons out. The pistons are a tight fit in the brake caliper and will pop out with a lot of force. Repeat the procedure with the caliper half.
NOTE: Always wear safety glasses when using compressed air and never point it directly at yourself or anyone else.
Caution: Do not place your fingers over the caliper pistons while removing them as serious injury could result.
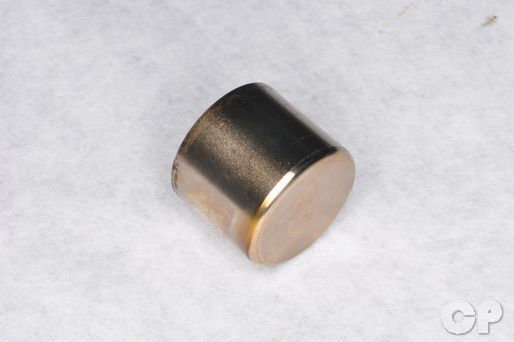
Remove the pistons from the caliper. Inspect the pistons and piston bores for wear and damage.
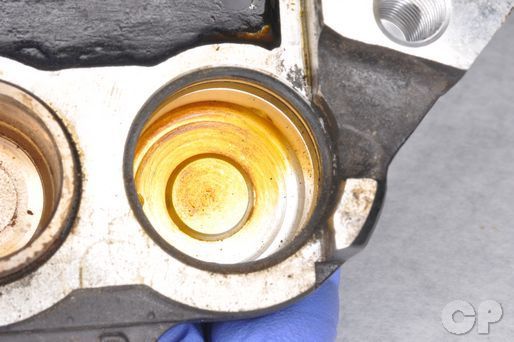


Remove the dust seals and fluid seals with a small pick.
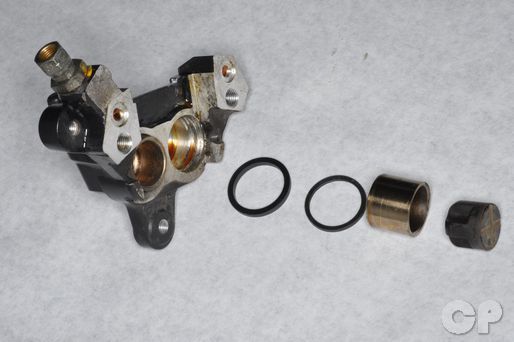
Discard the old seals. Clean the brake caliper components using fresh brake fluid.
Reassembly
Lubricate the caliper pistons, the caliper piston bores and the seals with DOT 4 brake fluid from a tightly sealed container.


Install new fluid seals and dust seals. Be sure the seals are all fully seated in their grooves.
Install the pistons. Push the caliper pistons completely into the caliper closed end first. You can use an old brake pads to push in both pistons at the same time.
Remove the piston cushions.
Make sure the caliper mating surface is clean. Install the two caliper O-rings.
Fit the caliper halves together.
Insert the two caliper bolts and tighten them to specification with a 14 mm socket.
(Front Brake Caliper Housing Bolt Torque: 30-36 N-m or 21.5-26.0 lb-ft)
Installation
Thread the brake hose into to the caliper. Install the caliper to the fork while guiding the brake disc between the pads.
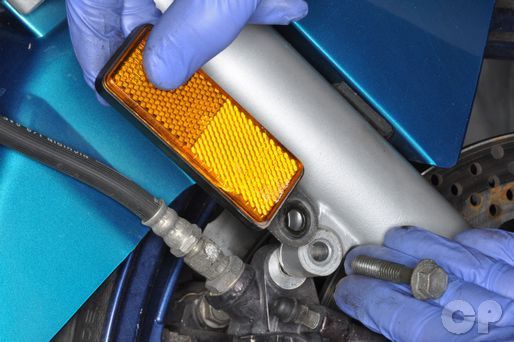

Install the two caliper mounting bolts and tighten them to specification with a 12 mm socket.
| ITEM | N-m | lb-ft |
| Front brake caliper mounting bolt (750) | 18-30 | 13.0-21.5 |
| Front brake caliper mounting bolt (600) | 15-25 | 11.0-18.0 |
Hold the brake hose joint with a 14 mm wrench and tighten the hose securely with a 14 mm wrench.
(Front Brake Hose Torque: 20 - 25 N-m or 14.5 - 18.0 lb-ft)
Fill the master cylinder reservoir with brake fluid and bleed the brakes. See the Brake Bleeding topic for more information.
Always check the brake function after working on the brake system.
Copyright - Cyclepedia Press LLC

Note: If you are viewing this document offline be sure to visit the latest version online at http://www.cyclepedia.com before attempting any repairs. Updates are made without notice.